Creating Color Coordinated Shaded Relief
Overview
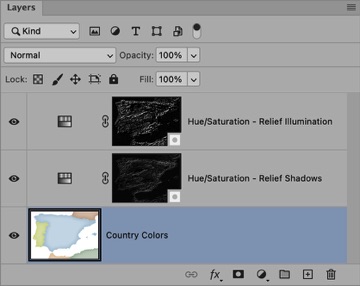
The procedure uses three Photoshop layers (right).
The bottom layer in this example contains country colors.
Above the country colors are two Hue/Saturation adjustment layers, each with a layer mask. The layer masks contain a modified grayscale relief that controls where the shadows and illumination occur.
The problem
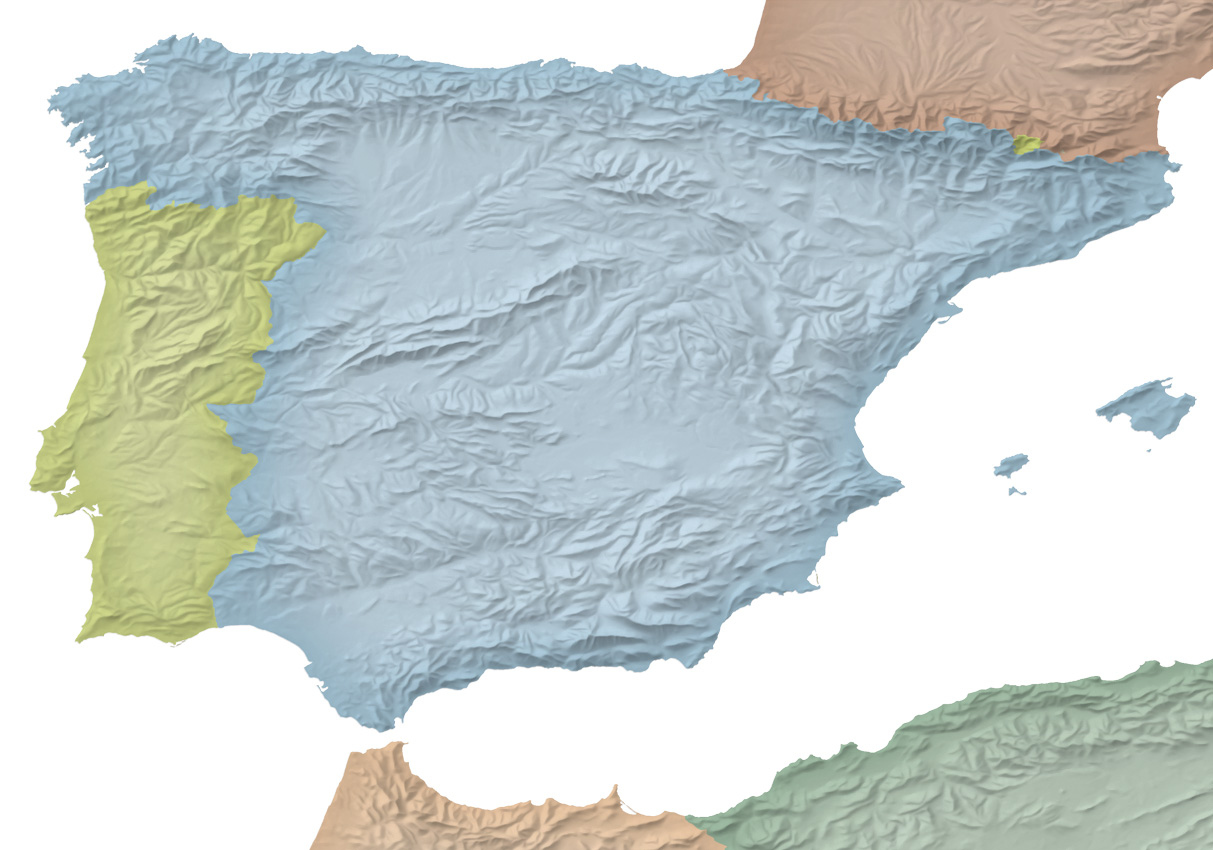
Map colors become muddy when combined with grayscale shaded relief using common blending modes, such as normal, darken, and multiply. A gray cast pollutes the clean colors below, especially in flat areas where the relief can contain anywhere from 10 to 25 percent value (above, left).
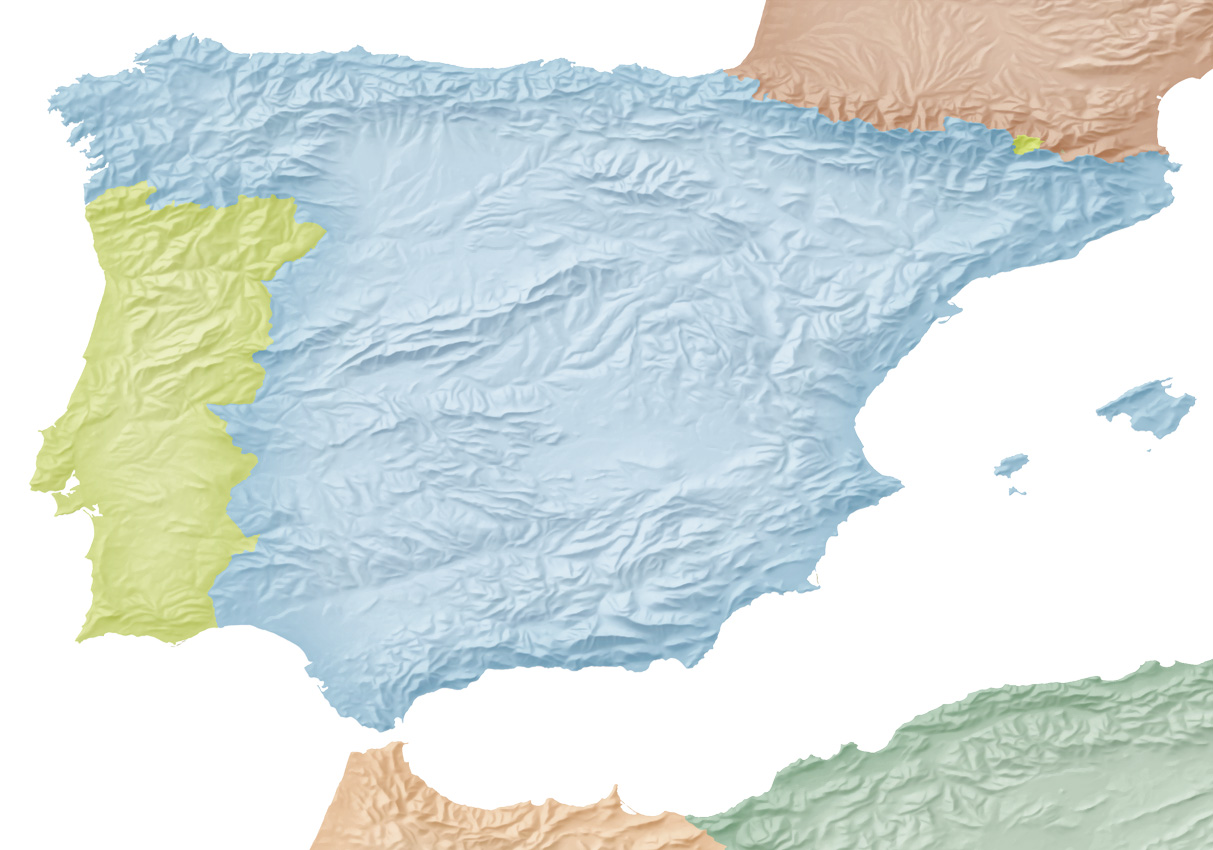
This tutorial introduces a Photoshop procedure for applying shaded relief to background colors without the muddying effect (above, right). Relief detail is maintained. The procedure works well with most types of maps, including land cover and hypsometric tints.
Procedure
1) Start by importing the shaded relief and background map colors into an RGB Photoshop file. The trick is keeping these two elements aligned. I did this with the mosaic function in Geographic Imager, a Photoshop GIS plug-in.
You can also copy and paste from Illustrator to Photoshop provided that the background map has the same dimensions as the shaded relief. The Illustrator vector art will rasterize when pasted into Photoshop. For this exercise, I recommend using the pre-made Photoshop file available above.
2) Make sure that the background colors are on the bottom Photoshop layer. Then add two Hue/Saturation adjustment layers above the background colors (Layer/New Adjustment Layer/Hue Saturation).
3) The white rectangles on the right side of the Hue/Saturation layers are empty layer masks. Paste the shaded relief into both of the masks. Make sure to Option-click (Mac) Alt-click (Windows) on each layer mask to activate them before pasting in the relief.
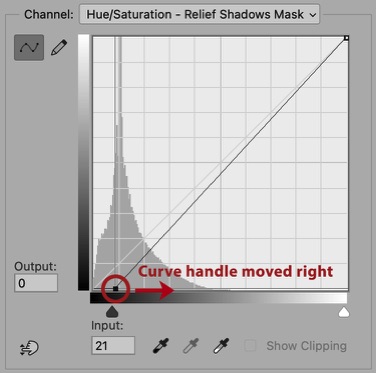
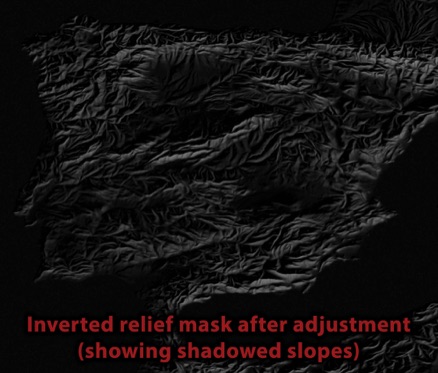
4) The bottom Hue/Saturation layer is for relief shadows. Set the blending mode to normal. Option-click or Alt-click on the layer mask to see the shaded relief that it contains. Turn the positive relief into a negative (Image/Adjustments/Invert).
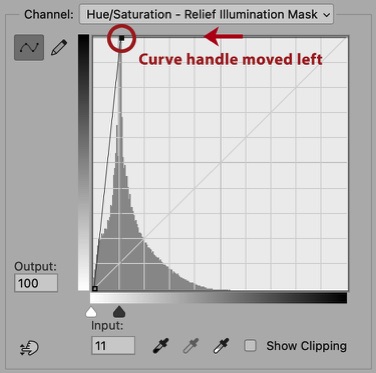
Apply a Curves adjustment to the inverted relief (Image/Adjustments/Curves). In the Curves window, drag the lower curve handle right until flat areas are nearly black, about 2-3% value. Use the Photoshop Info window (Window/Info) to inspect the values.
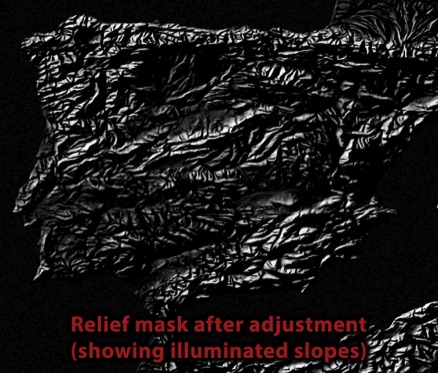
5) The top Hue/Saturation layer is for relief illumination. Set the blending mode to screen. Option-click or Alt-click on the layer mask. Do not invert the relief. Apply a Curves ajustment to the relief (Image/Adjustments/Curves). In the Curves window, drag the upper curve handle left until flat areas are nearly black, about 97-98% value. Use the Info window (Window/Info) to inspect the values.

5) It's time to have fun with colors now that the tedious setup is complete.
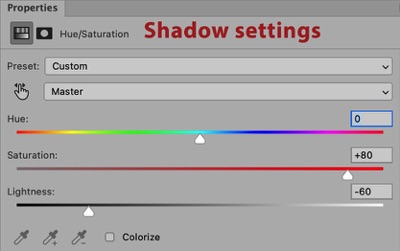
Shadow settings - Double-click the Properties icon on the left side the Hue/Saturation layer. In the Proprties window, move the Saturation slider to the right and the Lightness slider to the left. Moving the Saturation slider to +100 results in gaudy relief shadows. Moving it to -100 results in gray shadows. Adjust the Lightness slider to control the value of the relief shadows.
Illumination settings - Double-click the Properties icon on the left side the Hue/Saturation layer. In the Proprties window, move the the Lightness slider to the left to adjust the illumination strength.
You will need to go back and forth between the shadow and illumination settings to get just the right balance. Experiment.
More info: National Geographic cartographer, Matthew Chwastyk, introduced a different Photoshop procedure that acheives the same results at NACIS 2023. Listen to his talk here.