Making 3D Terrain Maps |
||||||||||
--Earth from Space |
||||||||||
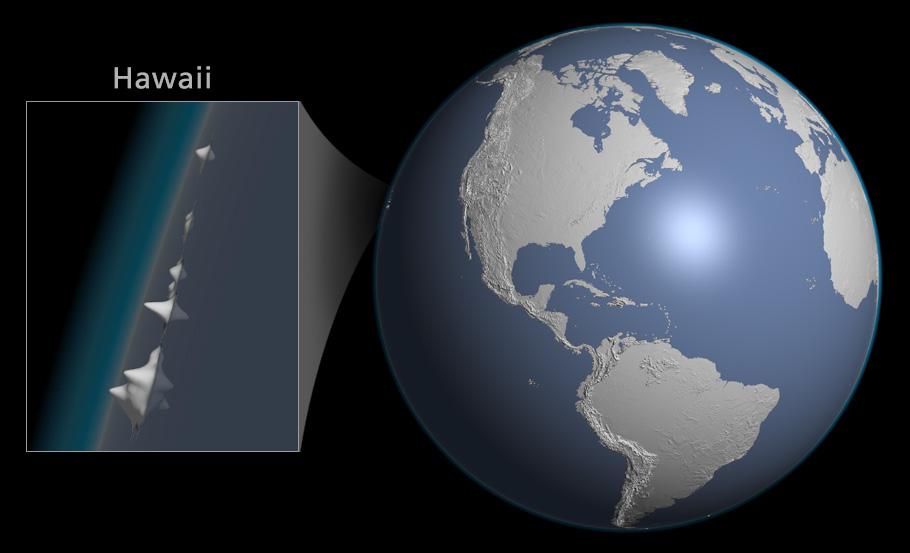
Having discussed on the previous page how to make 3D terrain maps with curved horizons, we will now move the virtual camera to a much higher altitude to see all of Earth from outer space. Technique 1 – Spherical rendering Spherical rendering yields true 3D spheres with 3D terrain. In the enlargement below, note how Hawaii's mountains protrude radially outward from Earth's surface. (The terrain in this example has 1,600 percent vertical exaggeration.) What I did: I created the scene in Natural Scene Designer Pro with spherical Earth Model specified (Settings/World/Earth Model). I used global elevation data in the Geographic projection. I placed the camera with a 150 millimeter telephoto lens 72,000 kilometers (45,000 miles) above Earth' surface. Finally, I added a reflective ocean layer (Settings/Water/Ocean) that conveniently wraps around Earth filling areas below sea level on the elevation data. Tips • Natural Scene Designer Pro will render a glowing atmosphere around Earth at the correct thickness. Select "Globe" in Settings/Sky/Sky Color Presets. • Because spherical rendering depicts the 3D terrain with illumination and shadows based on an adjustable light source, you can orient views of Earth however you wish, such as putting Australia on top. Finding the perfect light direction and elevation to illuminate terrain is not a problem. • Relating to the above point, any raster images that you drape on top of the terrain should not contain relief shading. The Natural Earth website offers several world land cover datasets without shaded relief that you can use for free. • The default 35 mm camera lens in Natural Scene Designer Pro creates a fish-eye lens effect that magnifies Earth's surface area on the sphere. While this is sometimes advantageous, for a more accurate depiction of Earth from space you should instead use a telephoto lens. To do this, go to Settings/Camera/Lens. |
||||||||||
 |
||||||||||
Hawaii on the edge: World elevation data rendered on a sphere. |
||||||||||
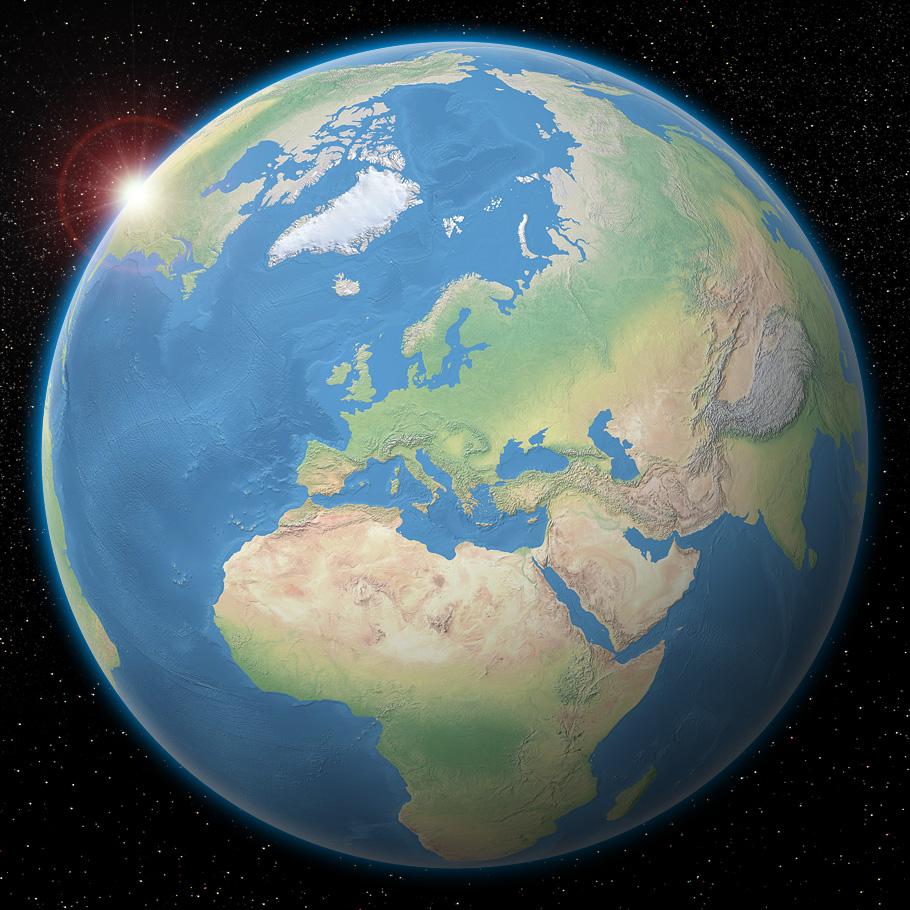
Technique 2 – Image reprojection I created the scene below in Natural Scene Designer Pro by reprojecting a Natural Earth II image data from the Geographic projection to Orthographic projection. Because the Natural Earth II image already contains shaded relief, I did not have to use digital elevation data to create this north-oriented view. However, had I created a south-oriented view, the shaded relief would invert because the light direction no longer would come from the upper left, the cartographic convention. In Natural Scene Designer Pro, go to Overlays/Reproject Image to select the raster dataset that you want to use. Select the Orthographic Projection. Then select the latitude and longitude of where you want the center of the world to be. |
||||||||||
 |
||||||||||
Natural Earth II raster data in the Orthographic projection. |
||||||||||
The Orthographic projection produces a globe-like Earth as if the reader were infinitely far away in space. Alternatively, the Perspective projection brings the virtual camera much closer to Earth, which magnifies the size of areas on the sphere (see illustration below). Lower camera elevations result in higher magnification. For example, if you lower the camera elevation to 200 kilometers and center the projection on 170 East, 38 South, relatively small New Zealand will occupy the entire sphere. |
||||||||||
 |
||||||||||
The Orthographic projection (left) and Perspective projection (right) compared. |
||||||||||
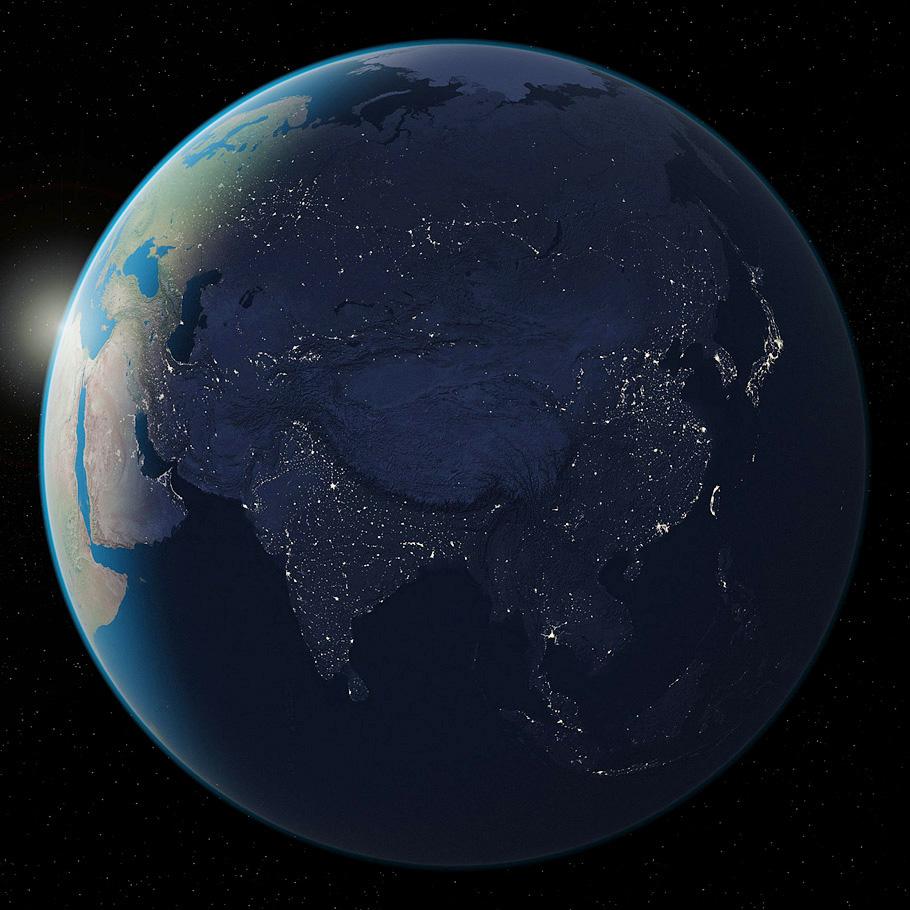
Photoshop special effects The large Natural Earth II scene centered on Europe (second image above) has a glowing atmosphere, cast shadow, universe filled with stars, and sun burst (yes, it is a bit much) that I added in Photoshop. The atmosphere is a combination of inner and outer glows (Layer/Layer Style/Inner Glow and Layer/Layer Style/Outer Glow). The white inner glow places a fringe of haze on Earth near the horizon. The blue outer glow creates an atmospheric layer seen against the black of outer space. The cast shadow (applied to the lower right) is a radial gradient (white to black) placed on a layer above the Natural Earth image. It uses multiply blending mode. The starfield is a free image that you download from here. The sunburst is a stock Photoshop filter (Filter/Render/Lens Flare). I used the 50-300 mm zoom lens. Click here to download the layered Photoshop file of the Europe scene to check out what I did. Resources For cities at night texture maps (see image below), global cloud maps, and other elements for creating Earth from space scenes, go the Natural Earth III site. |
||||||||||
 |
||||||||||
Asia at night created from a Natural Earth III texture map. |
||||||||||
 |
||||||||||