Making 3D Terrain Maps |
||||||||||||
--Bump Maps |
||||||||||||
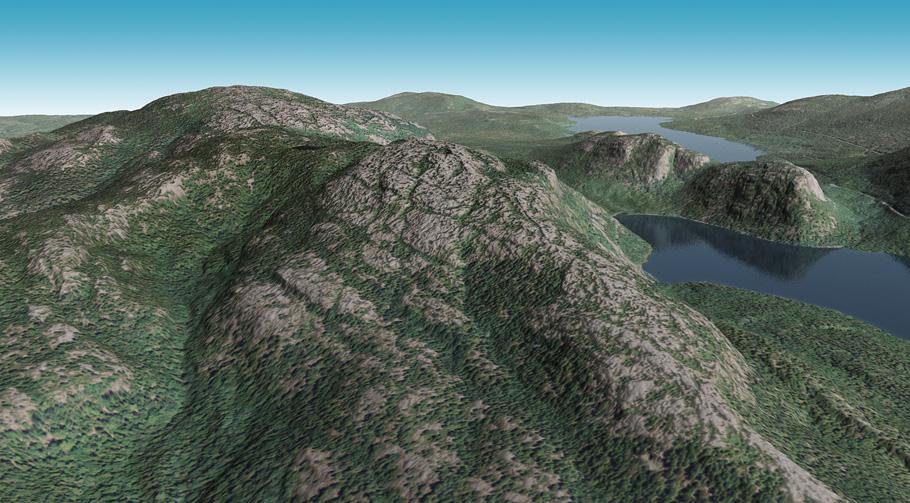
Bump mapping is a 3D technique for rendering realistic textures on surfaces that otherwise would look flat. The movie and gaming industries rely on the technique to create lavishly detailed CGI (Computer-Generated Imagery). Bump mapping works by reading the contrast information in draped images—adjacent light and dark tones—and then using it to render embossed textures. As you would expect, bump maps are indispensable for rendering 3D terrains. For example, the illustration below depicts the glacier-scoured landscape of Acadia National Park, Maine. The rugged granite mountains capture our attention because of a bump map texture applied in Natural Scene Designer Pro. |
||||||||||||
 |
||||||||||||
Acadia National Park, Maine, rendered with a bump map texture derived from the draped aerial photograph. |
||||||||||||
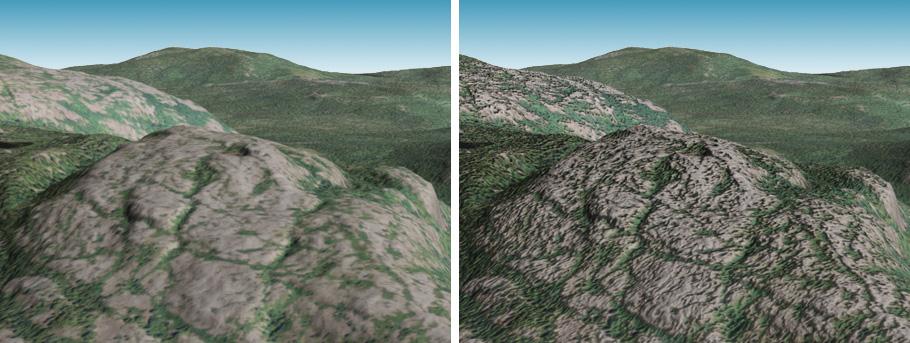
The comparative illustrations below of Acadia National Park show the dramatic realism acheived with bump map textures. Although the bump map texture derives from the draped aerial photograph, the aerial photograph need not be included in the final render (see second illustration below). You can combine bump map textures with any type of terrain overlay, including solid colors (15% gray in this example), hypsometric tints, land cover, etc. |
||||||||||||
 |
||||||||||||
An aerial photograph draped on terrain without a bump map (left) and with (right). |
||||||||||||
 |
||||||||||||
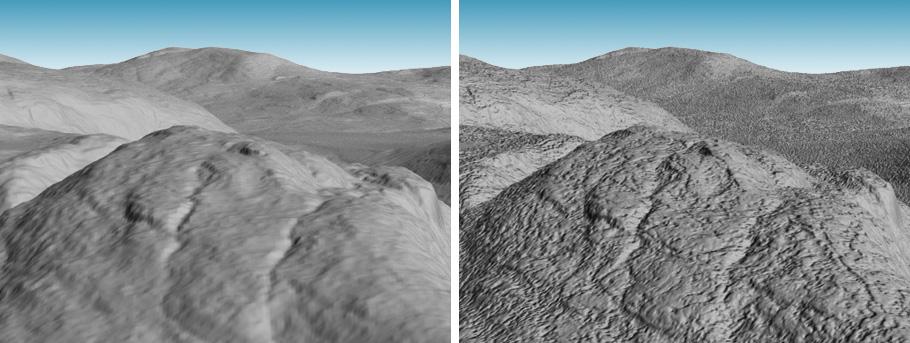
Plain gray terrain without a bump map (left) and with (right). |
||||||||||||
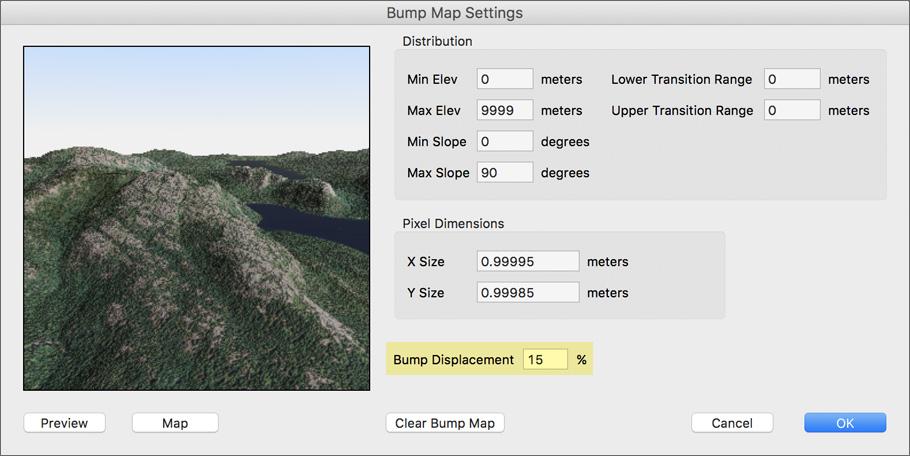
To import a bump map in Natural Scene Designer Pro, go to Settings/Terrain/Import Bump Map. If your draped image is georeferenced, the program will automatically register it to your terrain. Next, in the Bump Map Settings window, you can set the amount of Bump Displacement (highlighted yellow below). You will need to experiment with this—the default 100% value is often too much if your image contains considerable contrast. You can also control the distribution of bump mapping by elevation and slope. |
||||||||||||
 |
||||||||||||
The Bump Map Settings window in Natural Scene Designer Pro. |
||||||||||||
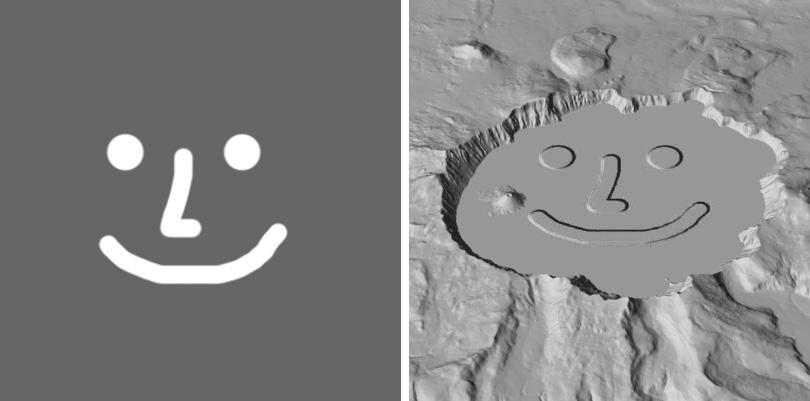
Comments • On images used to create bump map textures, light tones are interpreted as high and dark tones as low. This can sometimes create problems if you need dark objects in your image to stick up. To counteract this, when importing the bump map in Natural Scene Designer Pro, check the Invert Colors box. • I often render two scenes with bump map textures, one with inverted colors and the other with non-inverted colors. I then place the two scenes on separate layers in Photoshop and apply masks depending on whether I want textures to stick up or down. • Related to the last point, I also render a scene without bump map textures and use it in Photoshop to diminish textures for certain areas that appear too harsh. • Sometimes I make a duplicate of my draped aerial photograph and modify it specifically for use as a bump map. Converting it to grayscale allows me to better judge light from dark. I then will adjust the relative tonality, which controls how much texture will appear. For example, I might only want to apply texture to lava flows in a scene, so I would apply flat, neutral gray to all areas in the image that are not lava. • Bump maps need not derive from aerial photographs. You can create custom bump map textures from any image, such as the one below :-) |
||||||||||||
 |
||||||||||||
(Left) A custom bump map. (Right) Light tones appear higher in the final rendered 3D scene . |
||||||||||||
 |
||||||||||||