Making 3D Terrain Maps |
||||||||||
--Lines |
||||||||||
Of the symbol classes on maps—areas, points, type, and lines—I consider lines most problematic for creating visual noise and generally avoid using them whenever I can. For example, how many small drainages are really necessary on a tourist map, or other types of maps for that matter? My reservations notwithstanding, avoiding lines is not always possible and on this page I discuss how to display them on 3D terrain maps, such as the example below. |
||||||||||
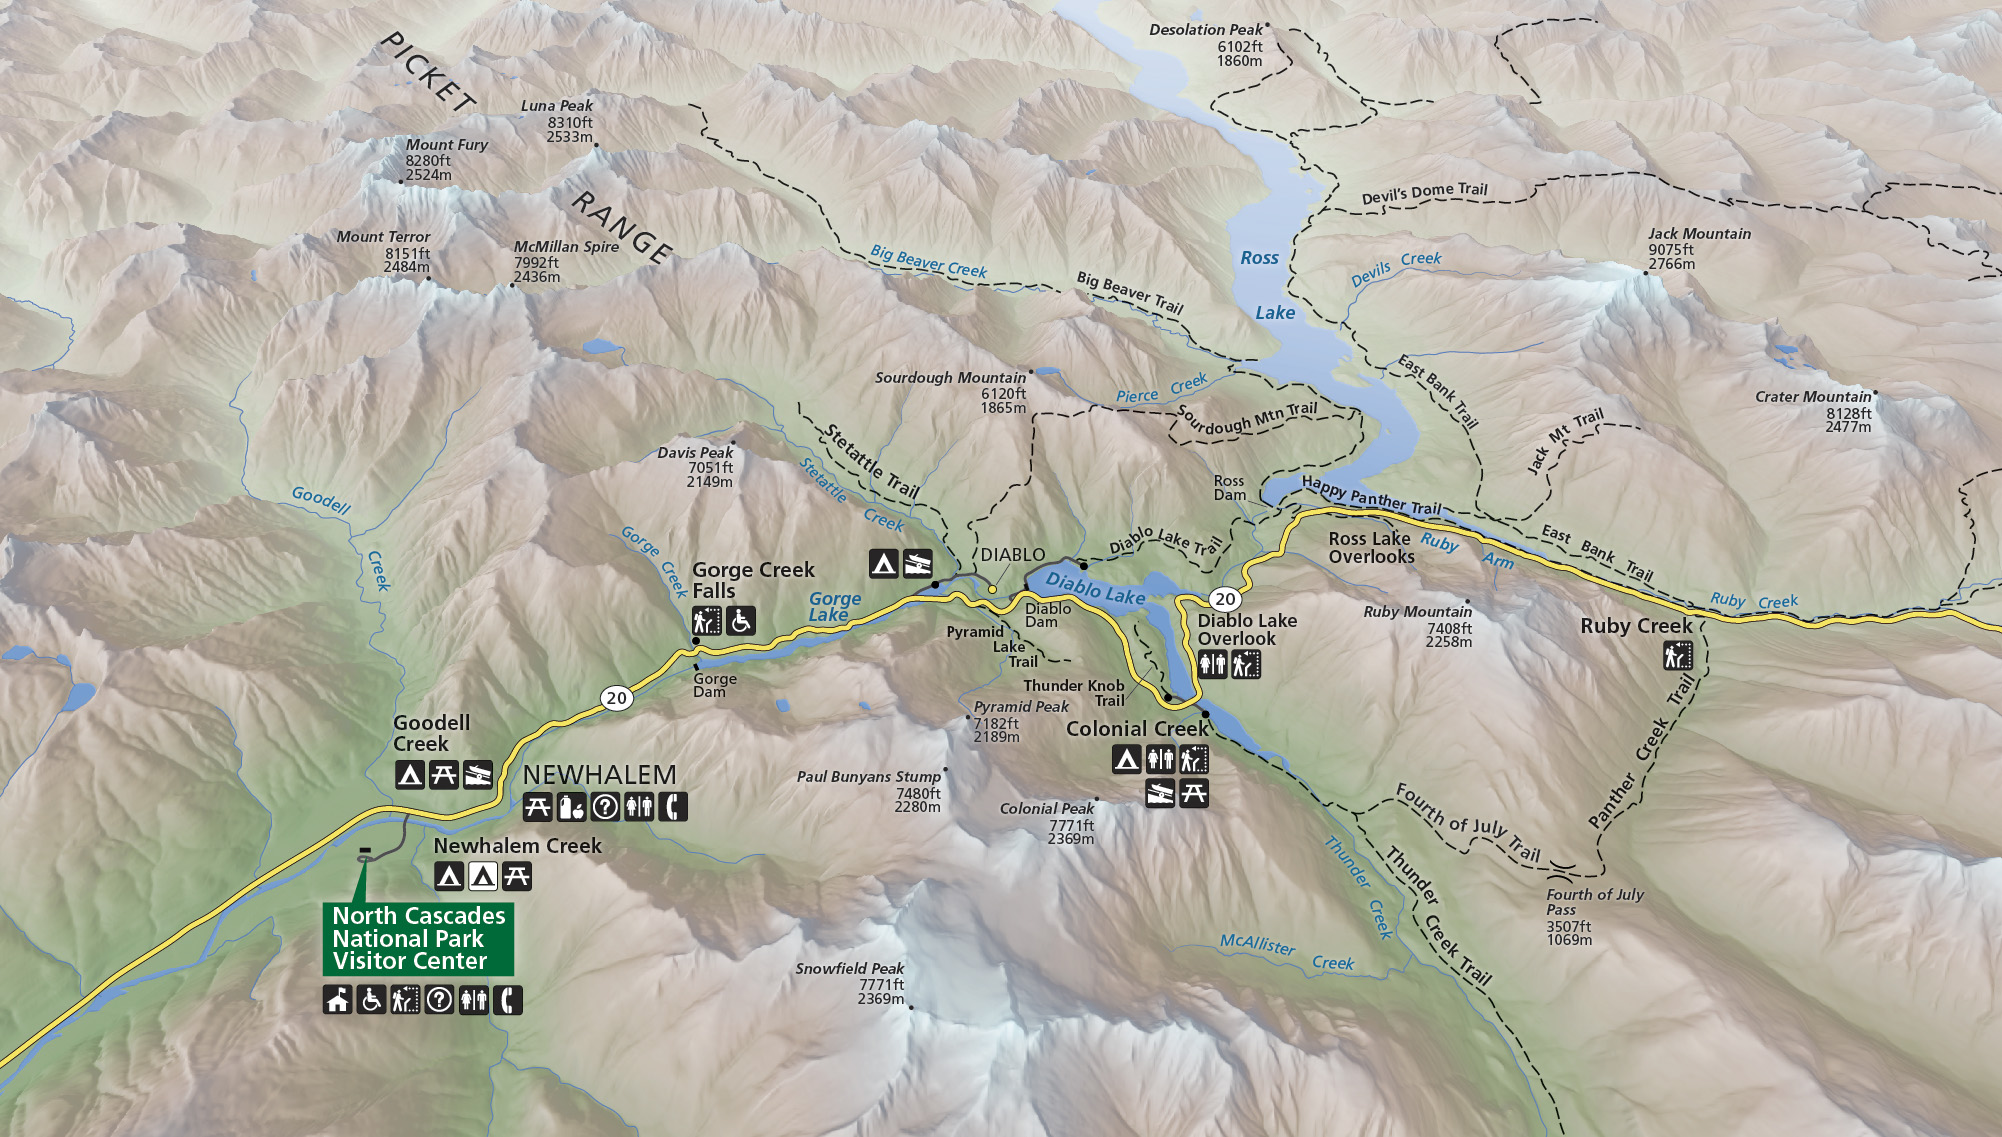 |
||||||||||
Ross Lake National Recreation Area, Washington, created by NPS cartographer, Jim Eynard. (Click map to enlarge.) |
||||||||||
In Natural Scene Designer Pro, you have two choices for displaying lines in 3D scenes. The traditional method (with older software versions) is to import a shapefile, such as roads; assign color, opacity, and width; and then render a 3D scene with the lines "baked in" the terrain. The problem with this method is that the lines vary in width depending on the steepness and orientation of slopes. Editing "baked in" lines in Photoshop, such as when hidden by low hills is very difficult (see illustration below, top). Getting acceptable lines on a 3D map usually involved tedious tracing in Adobe Illustrator. Natural Scene Designer Pro 7.0 offers a better way to depict lines on 3D terrain maps. You can now export shapefile overlays as vector SVG files that open in Adobe Illustrator. The exported lines conform to the surface of the terrain and include a bounding box for easy registration with the raster terrain art. The exported vector lines have a consistent width that you can easily edit for terrain occlusions (see illustration below, bottom). |
||||||||||
 |
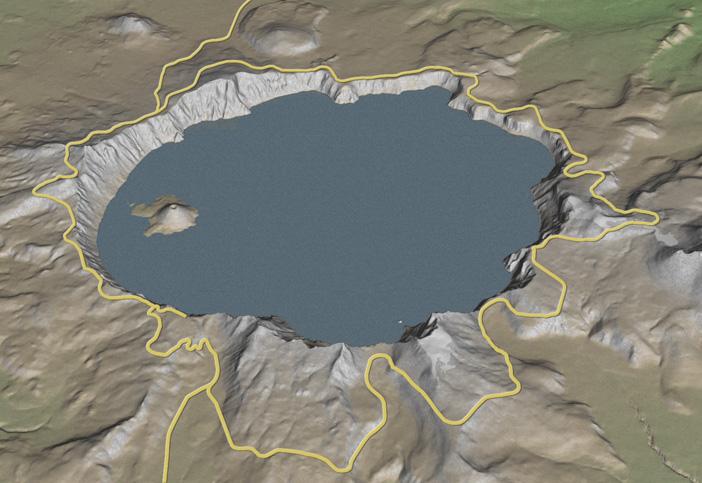
||||||||||
Compared to "baked in" raster lines, vector lines are consistent in width (A) and easily edited for line breaks (B). |
||||||||||
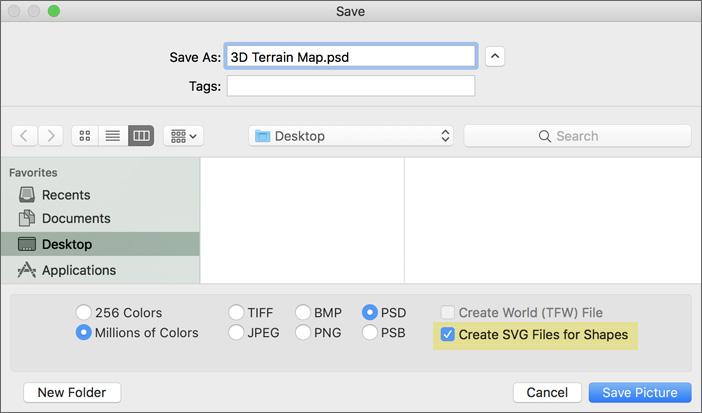 |
||||||||||
Exporting vector lines in Natural Scene Designer Pro via the Save window. |
||||||||||
Comments • Taking perspective into account within 3D scenes, I usually depict background lines thinner than those in the foreground. In Adobe Illustrator, I use the Scissors Tool to break the lines into several "zones" from front to back to which I assign incrementally thinner stroke widths (see illustration below). • After editing lines in Adobe Illustrator, I sometimes copy and paste the lines into the Photoshop file containing the rendered terrain. To maintain registration, I include a bounding box with the Adobe Illustrator lines that matches the dimensions of the Photoshop terrain. Once the lines are in Photoshop, I can then apply an Embossment layer style to etch the roads into the landscape (see illustration below). I am careful to match the embossment light direction to that used to illuminate the terrain. Click here to download the layered Adobe Photoshop file used to create the scene below. |
||||||||||
 |
||||||||||
Embossed roads tapering to a narrower width in the scene background. |
||||||||||
 |
||||||||||