Making 3D Terrain Maps |
||||||||||
--Foreground Shadows and Background Haze |
||||||||||
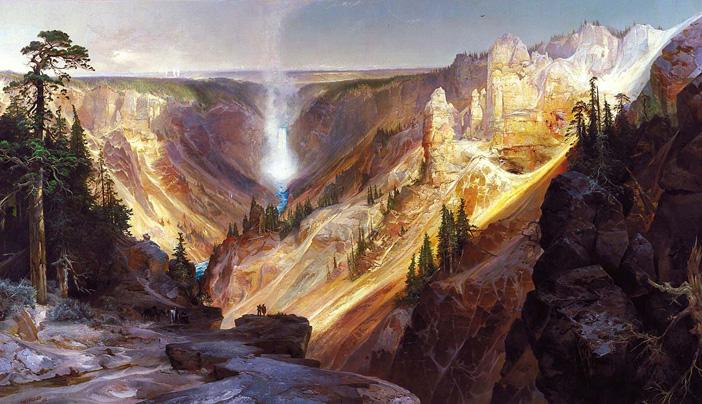
Thomas Moran’s inspirational “The Grand Canyon of the Yellowstone" (shown below) was on display at the US Capitol in 1872, the same year that Congress established Yellowstone National Park. His art is relevant to 3D terrain mapping for its treatment of visual depth with light and shadows. The dark foreground tones guide your eyes to the Grand Canyon of the Yellowstone depicted with luminous colors in the middle ground. Your eyes then go to Lower Yellowstone Falls, partially obscured by mist, and eventually find three steaming geysers in the hazy background. |
||||||||||
 |
||||||||||
The Grand Canyon of the Yellowstone by Thomas Moran. Source: Smithsonian American Art Museum. |
||||||||||
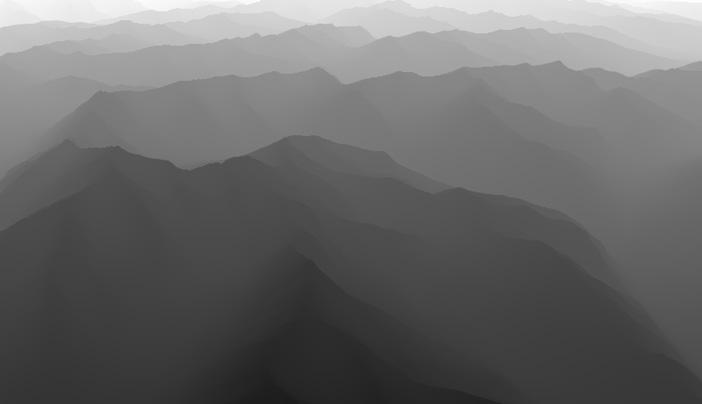
It is easy to apply Moran's classic painting techniques—background haze and foreground shadows—to your 3D scenes. To create background haze, first render a distance mask in Natural Scene Designer Pro, which you will find it as one of the options in the "Render" menu. The image below is a distance render for a random location in North Cascades National Park. Areas closest to the virtual camera are dark and the tones get progressively lighter with distance. |
||||||||||
 |
||||||||||
A distance mask of North Cascades National Park, Washington. |
||||||||||
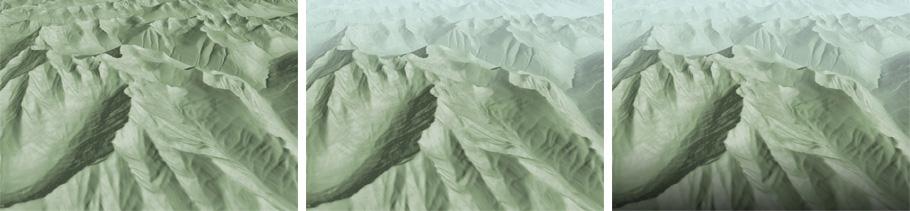
The next steps are in Photoshop. Create a new layer above the terrain to which you want to apply haze, fill the layer with white or blue-white, add a layer mask, and paste the distance mask into the layer mask. Decrease the opacity of the haze layer to lessen the amount of haze. You can optionally apply a curves adjustment to the distance mask to precisely control where the haze starts in your scene. Adding a foreground shadow works much the same way. In Photoshop, create another layer on top of your terrain, fill it with black or some other dark color, and add a layer mask. Then use the gradient tool in the layer mask to modulate the shadow intensity (tip: hold down the shift key to constrain the gradient to a vertical alignment). For most scenes, just a little darkening is all that you will need in the immediate foreground. Vary the layer opacity to control darkness. The illustration below shows background haze and foreground added to a typical mountain scene. The layered Photoshop used to create this example is available here. |
||||||||||
 |
||||||||||
(left) A plain 3D terrain of North Cascades National Park, Washington. (middle) The same terrain with background haze. (right) And the terrain with a foreground shadow. |
||||||||||
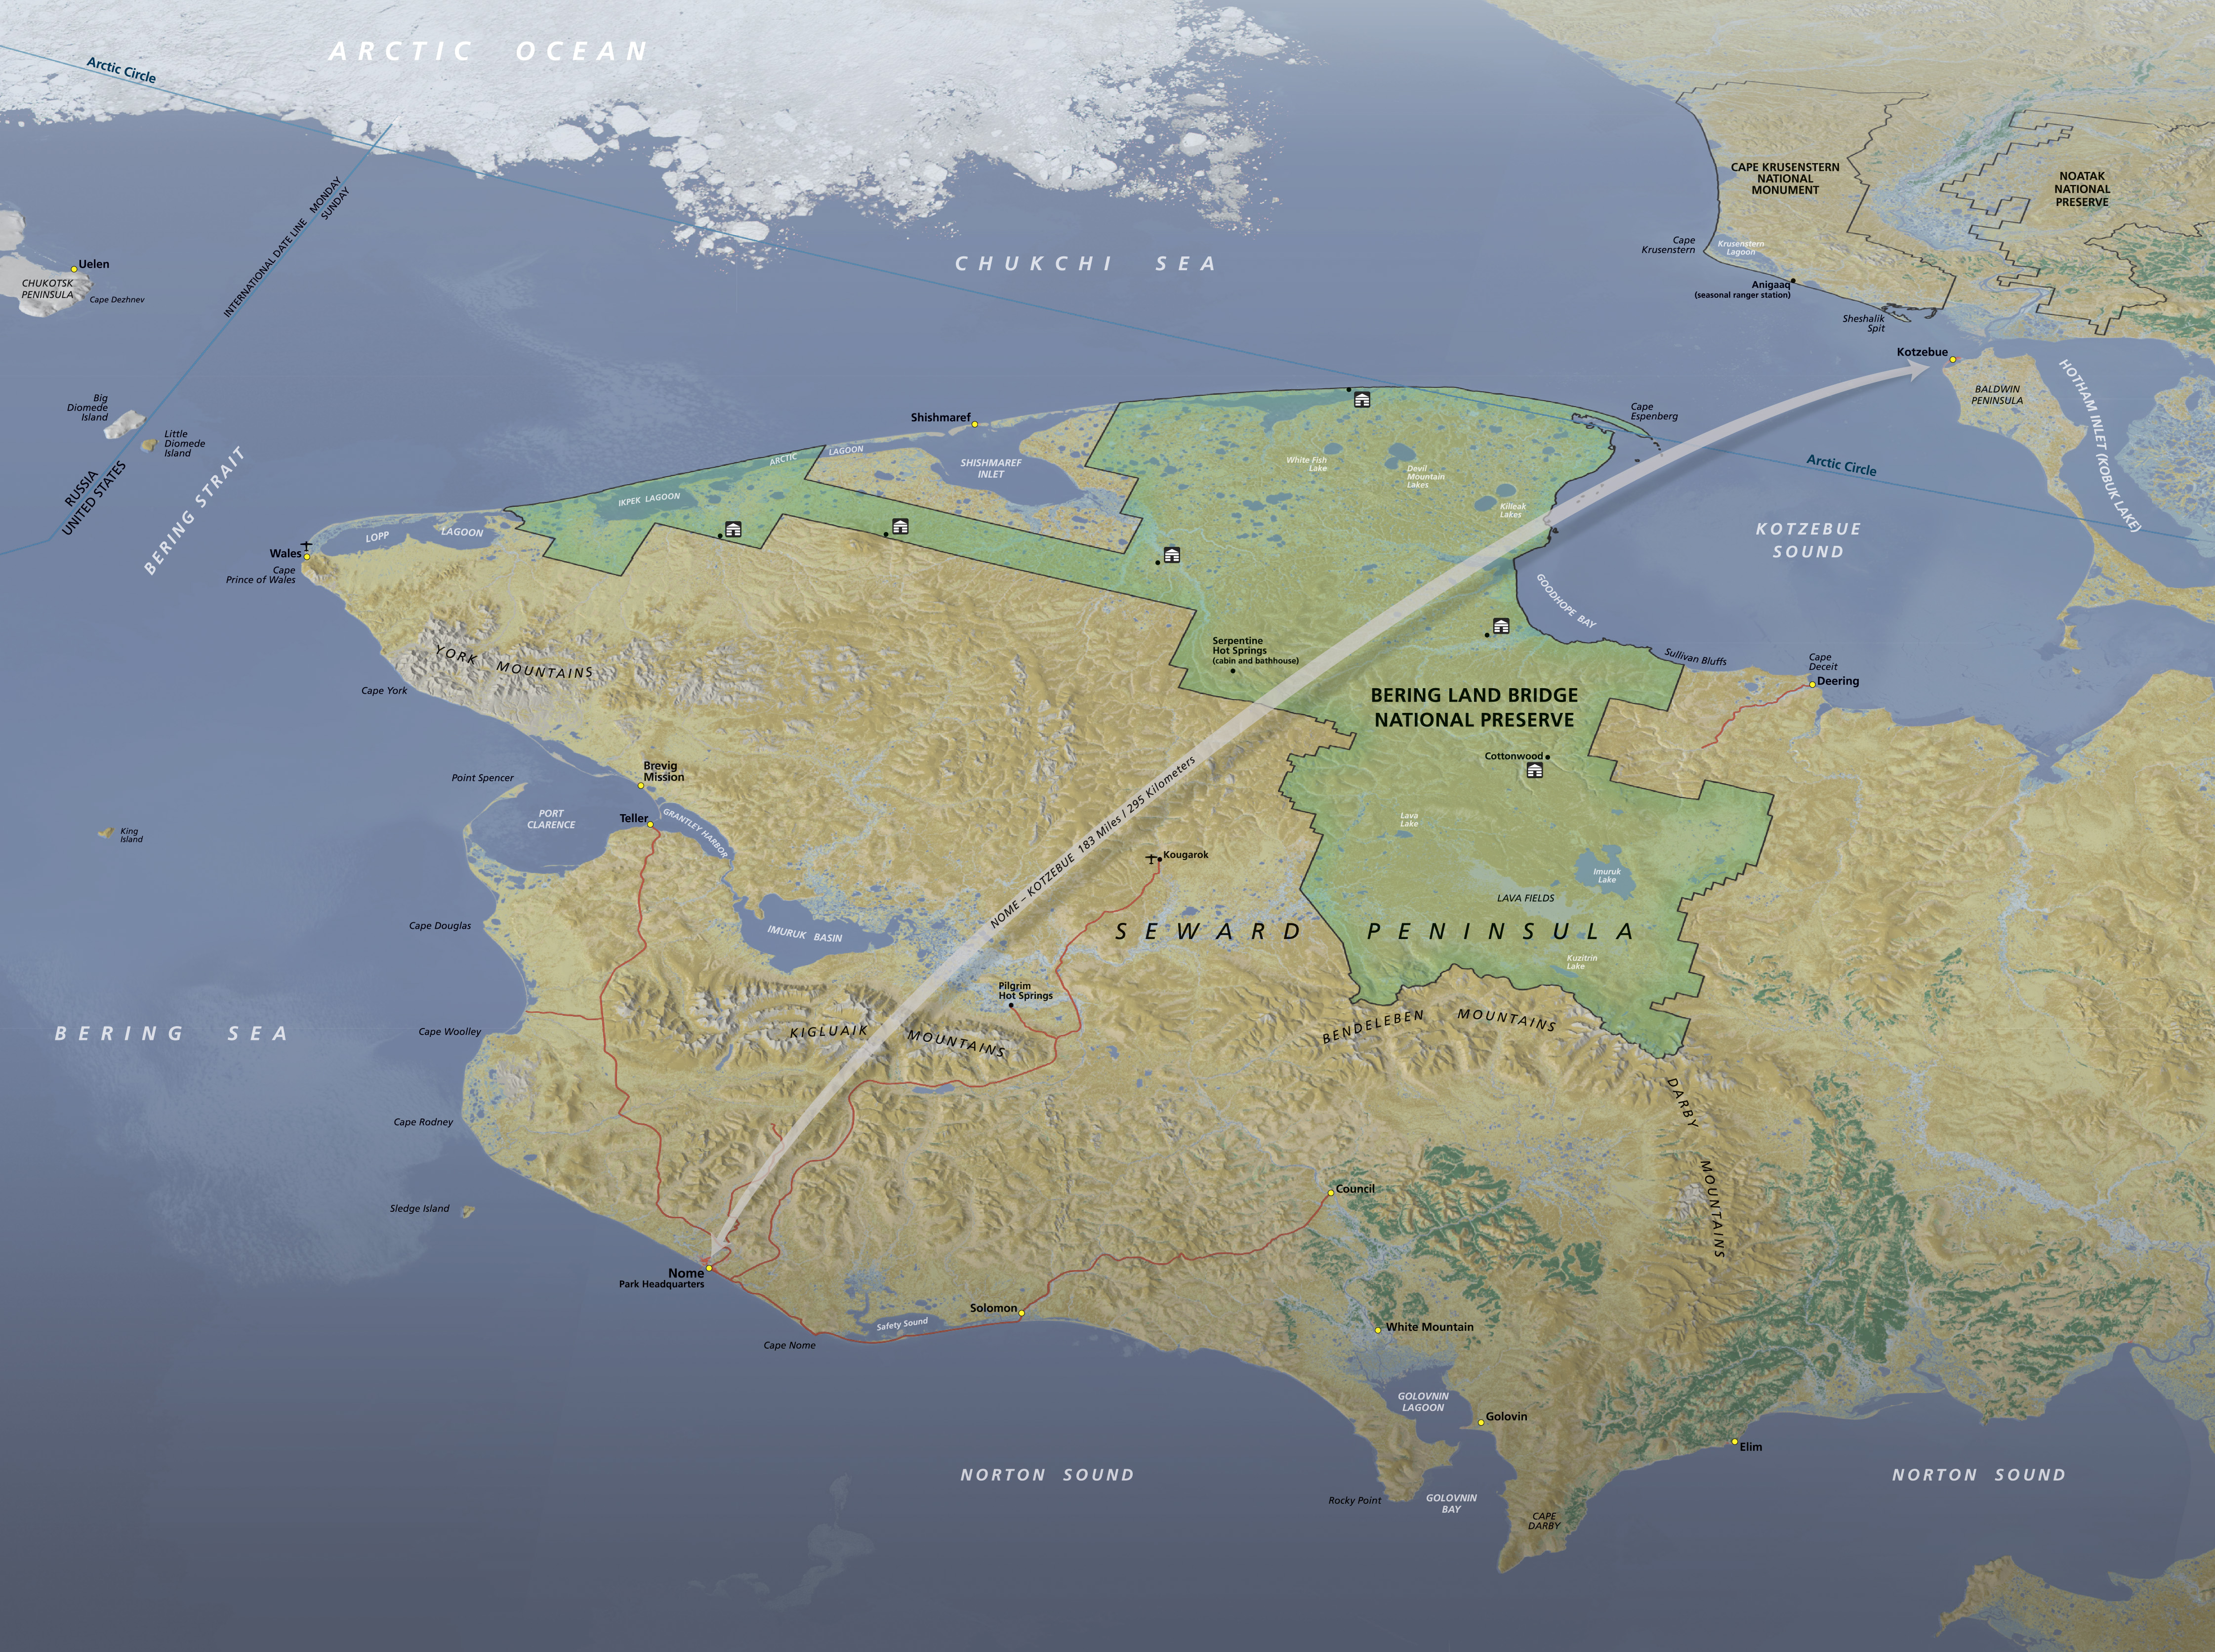
Using a distance mask rendered in Natural Scene Designer Pro to create haze works best with large-scale scenes viewed from a shallow angle. Rendered distance masks, however, are unnecessary for small-scale scenes viewed from high above. Instead, place a simple gradient in a Photoshop layer mask in the same manner that you used to create the foreground shadow (see Bering Land Bridge map below). |
||||||||||
 |
||||||||||
An unpublished draft map of Bering Land Bridge National Preserve, Alaska, with a foreground shadow and background haze made with Photoshop gradients. (Click map to enlarge.) |
||||||||||
Additional comments • I use background haze on all 3D terrain maps, sometimes copiously. By contrast, I use a foreground shadow less often and then only sparingly. • Although Natural Scene Designer Pro has a haze option in the Sky settings tab, I rarely use it. The built-in Natural Scene Designer haze covers too much of the foreground in the typical scenes I create from a high oblique angle. I prefer to add haze in Photoshop, which offers precise control and the ability to edit haze at later stages of map production. • Haze and shadow gradients can appear with banding artifacts when applied over smooth water surfaces. Adding a little noise with Photoshop to the gradients can lessen this problem. • Haze and shadows are an excellent way to give the illusion of depth to 3D scenes created with telephoto camera lenses previously discussed here. |
||||||||||
 |
||||||||||