Sentinel-2 Photoshop Tutorial
The European Space Agency distributes Sentinel-2 scenes at the Copernicus data portal.
Procedure
1) Downloading data requires that you first sign up as a registered user.
2) After logging in, near the top of the page, select "Explore the Data" and "Copernicus Browser."
3) Zoom to your area of interest in the map window.
4) In the "Browser" panel on the left side, click the "Search" tab.
5) For Data Sources, select Sentinel-2, check the boxes for L2A and L2AP, and use the slider to specify the maximum amount of cloud cover.
6) Specify the Time Range. (The default is the last 30 days.)
7) Click the Search button at the bottom to see the available scenes listed in reverse chronological order. Click on the Visualize button under a thumbnail to inspect the scene at full-resolution.
8) If you like what you see, go back to the Search tab to download the raw data.
Getting the data
Figure 3. Search settings.
9) Decompress the rather large file that you downloaded and then drill through the nested folders. The "R10m" folder contains the highest-resolution data at 10 meters/pixel. It includes raw Sentinel-2 bands (B02, B03, B04, and B08) and a true-color image (TCI).
Figure 5. This tutorial uses the data highlighted in yellow.

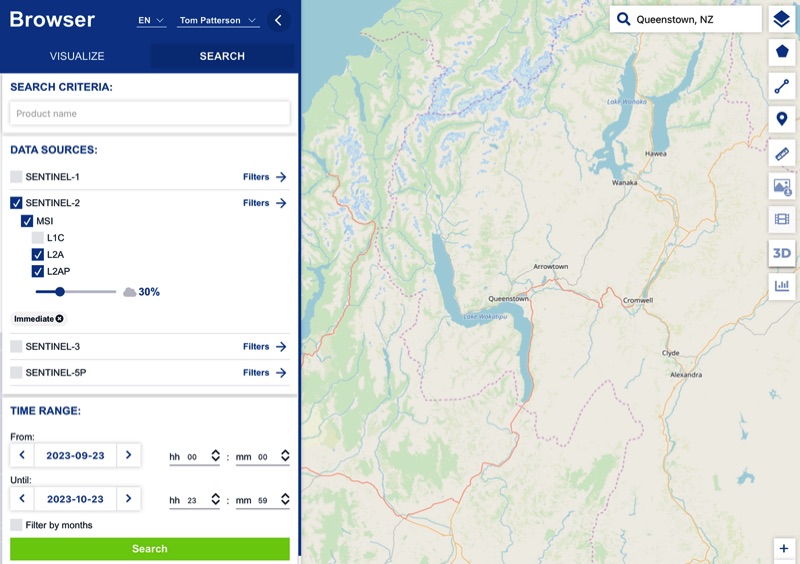
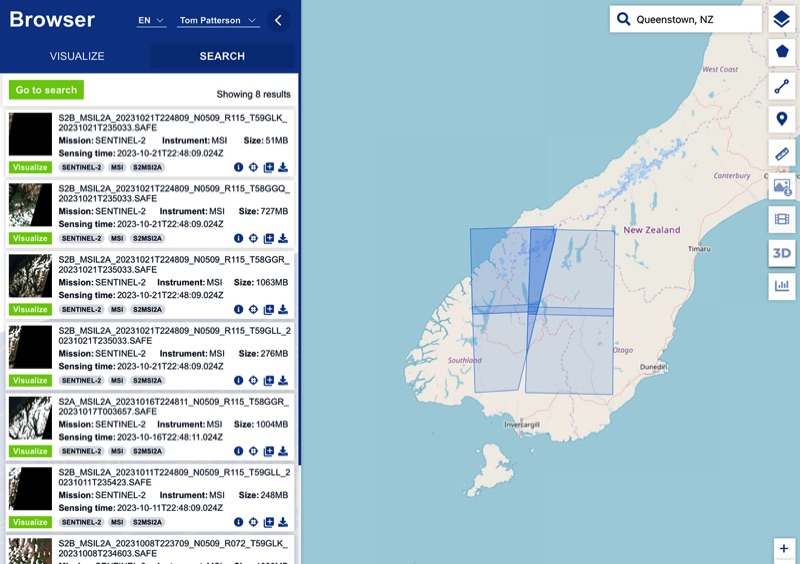
Figure 4. Search results.
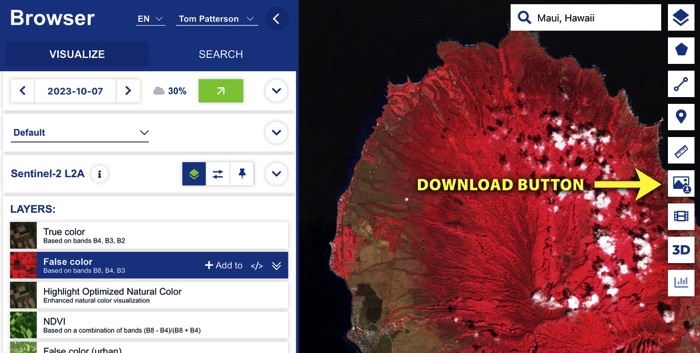
Quick Tip: Don't need raw Sentinel-2 data? Get smaller pre-made images by clicking the download button in the Browser window. Go to the "Analytical" tab for georeferenced images in either the Web Mercator, Geographic, or UTM projections.