Sentinel-2 Photoshop Tutorial
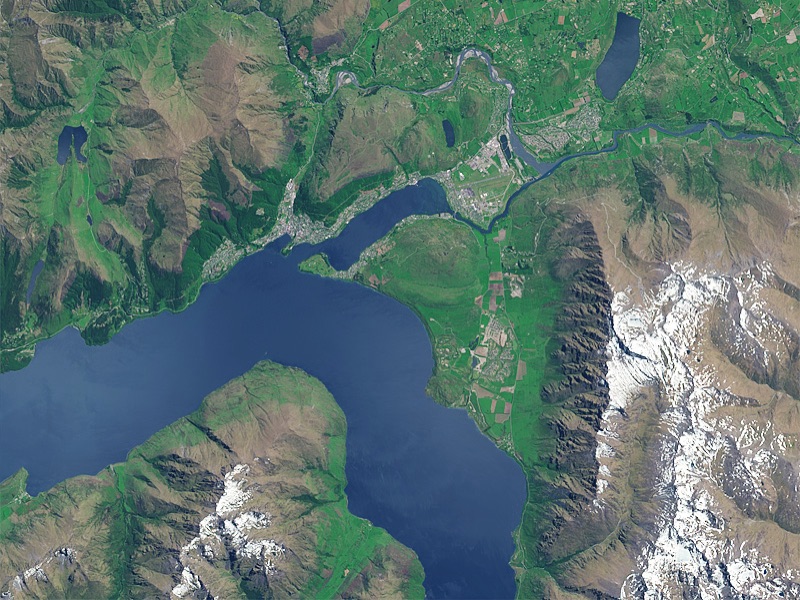
This tutorial explains how to process Sentinel-2 satellite data, released by the European Space Agency for free, into natural color images similar to the one below (Figure 1). Beautification is the goal—nature often can use a little help when using satellite images for maps and graphical presentations.
To do this tutorial you will need Adobe Photoshop and Avenza Geographic Imager, a plugin that adds GIS functionality to Photoshop. Trial versions are available for both applications. You should also have intermediate Photoshop skills, a good internet connection, and a computer with plenty of RAM. Step-by-step instructions show how to create images of three very different landscapes. The techniques become more advanced with each image.
Sentinel-2 at a glance
● The European Space Agency operates two identical Sentinel-2 satellites, Sentinel-2A and Sentinel-2B.
● The launch of Sentinel-2A occurred in 2015, and Sentinel-2B in 2017.
● Each Sentinel-2 satellite takes images of the same place on Earth every 10 days. Because of staggered phasing, they take images of the same place every 5 days.
● Coverage includes land areas from 56° S to 84° N, coastal waters, all of the Mediterranean, and oceanic islands larger than 100 square kilometers.
● The taking of images occurs around 10:30 AM.
● Image width = 290 kilometers (180 miles).
● Images are georeferenced in the UTM/WGS 84 coordinate system.
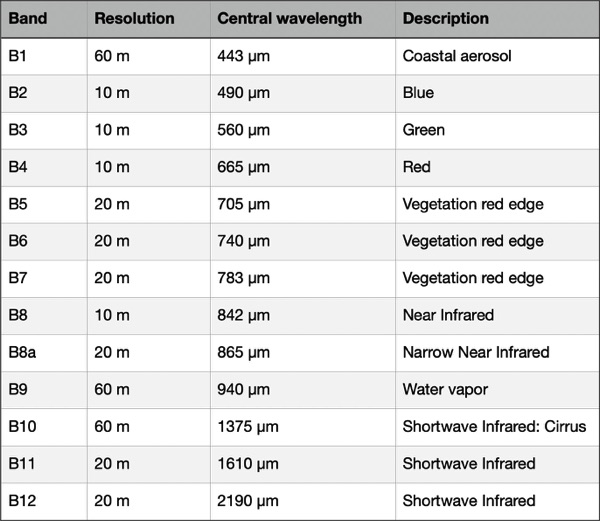
● Sentinel-2 does not take photographs. The satellite sensors collect data from discrete portions of the electromagnetic spectrum known as bands, which differ by their wavelength. There are 13 bands (Figure 2).
● Each data band is a 16-bit greyscale image in JPEG2000 format.
● In addition to the raw data bands, downloads include a true-color image at 10, 20, and 60-meter resolution (comprised of bands 4, 3, and 2). The true-color images are georeferenced RGB files at 8-bit color resolution.
Introduction

Figure 1. Sentinel-2 image of Lake Wakatipu and Queenstown, New Zealand.
Figure 2. Sentinel-2 bands.
